Hi all🙋🏻,

Weekends’ afternoon… Planned to bake some cronuts🍩😄!!!! As vacation has also started.. Children crave for something new everytime.
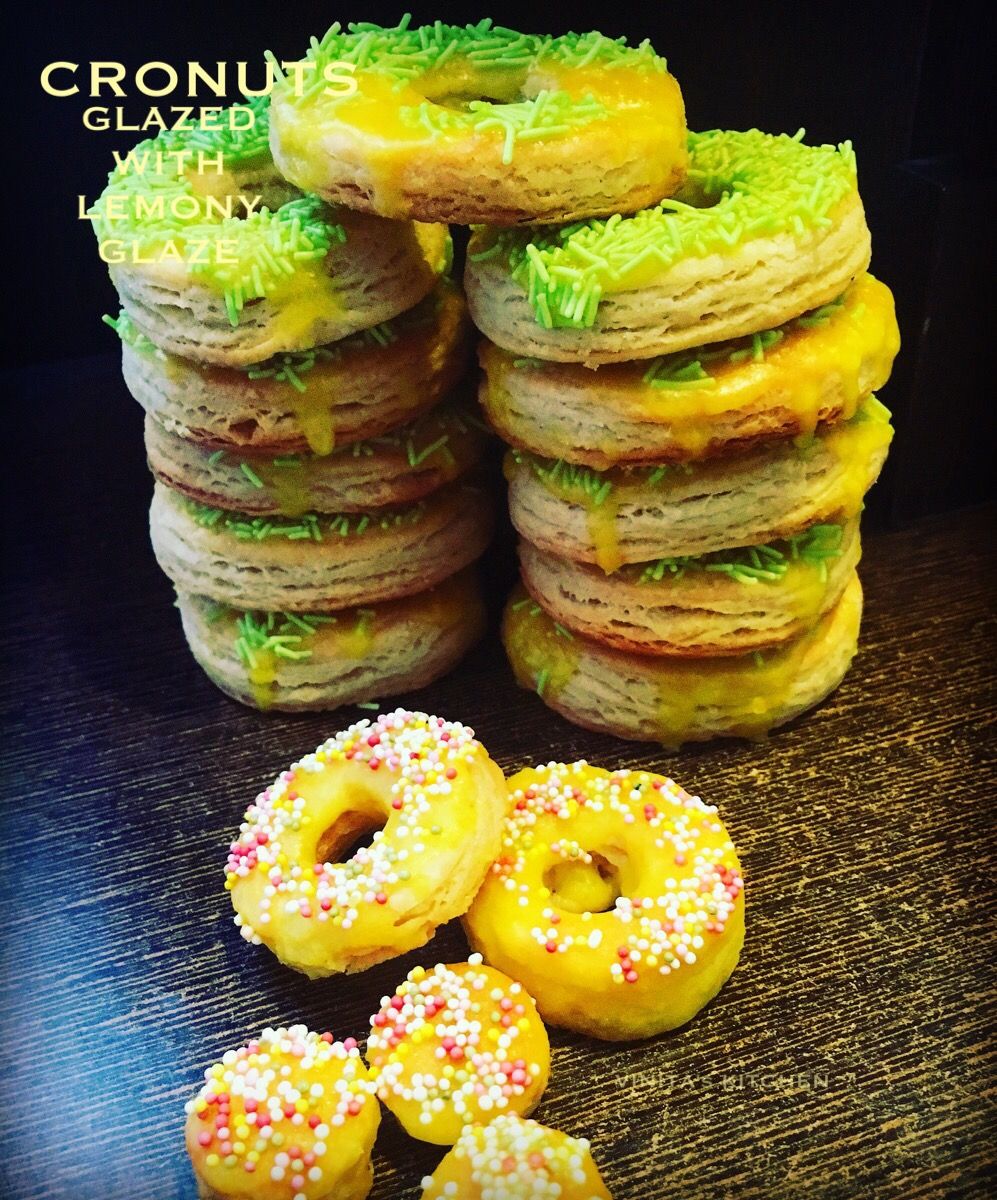
Let me tell you about the CRONUTS first. This name is derived from both croissants and donuts. It has the shape of donuts and the procedure is same like of croissants. That is the reason it has become CRONUTS. CRO from CROissants and NUTS from doNUTS.😄
Recipe is just as like of croissants which I have posted earlier. There is only change at the last stage. Instead of cutting into rectangles, we have to cut into roundels which you can do with cookie cutter and use any cap of a bottle for smaller roundels in the middle.
Now the time to introduce the LEMONY GLAZE. It’s the perfect glaze I think for these cronuts. Sweet and tangy☺️😋. Really goes well with cronuts.
This recipe yields 28-30 cronuts and 28-30 munchkins aka Baby cronuts…😄.. Munchkins are the small roundels which I took out from the bottle cap while making roundels in the middle. Leftovers of cronuts from the sides I just baked it in the same form. I will make CARAMEL CRONUTS PUDDING from it. Link of the recipe is given below.
CARAMEL CROISSANTS PUDDING | homemade delight
INGREDIENTS:
FOR CRONUTS:
RECIPE:
4 Cups + 3 tbsp or 500 gms APF (Maida)
250 gms salted butter
1 tbsp active dry yeast
1/4 cup honey.. Yeast will act faster in comparison to sugar.
1 tsp salt
1 tsp vegetable oil for greasing a deep bowl
1 cup milk
1/2 cup water
some flour for dusting
FOR GLAZE:
8 tbsp powdered sugar
Juice of 2 lemons
Few edible sprinklers
METHOD:
Take a bowl and add milk, water and honey. Heat till lukewarm and yeast into it. Set it aside for 15 minutes until frothy. It may take couple of more minutes, but it should be frothy.
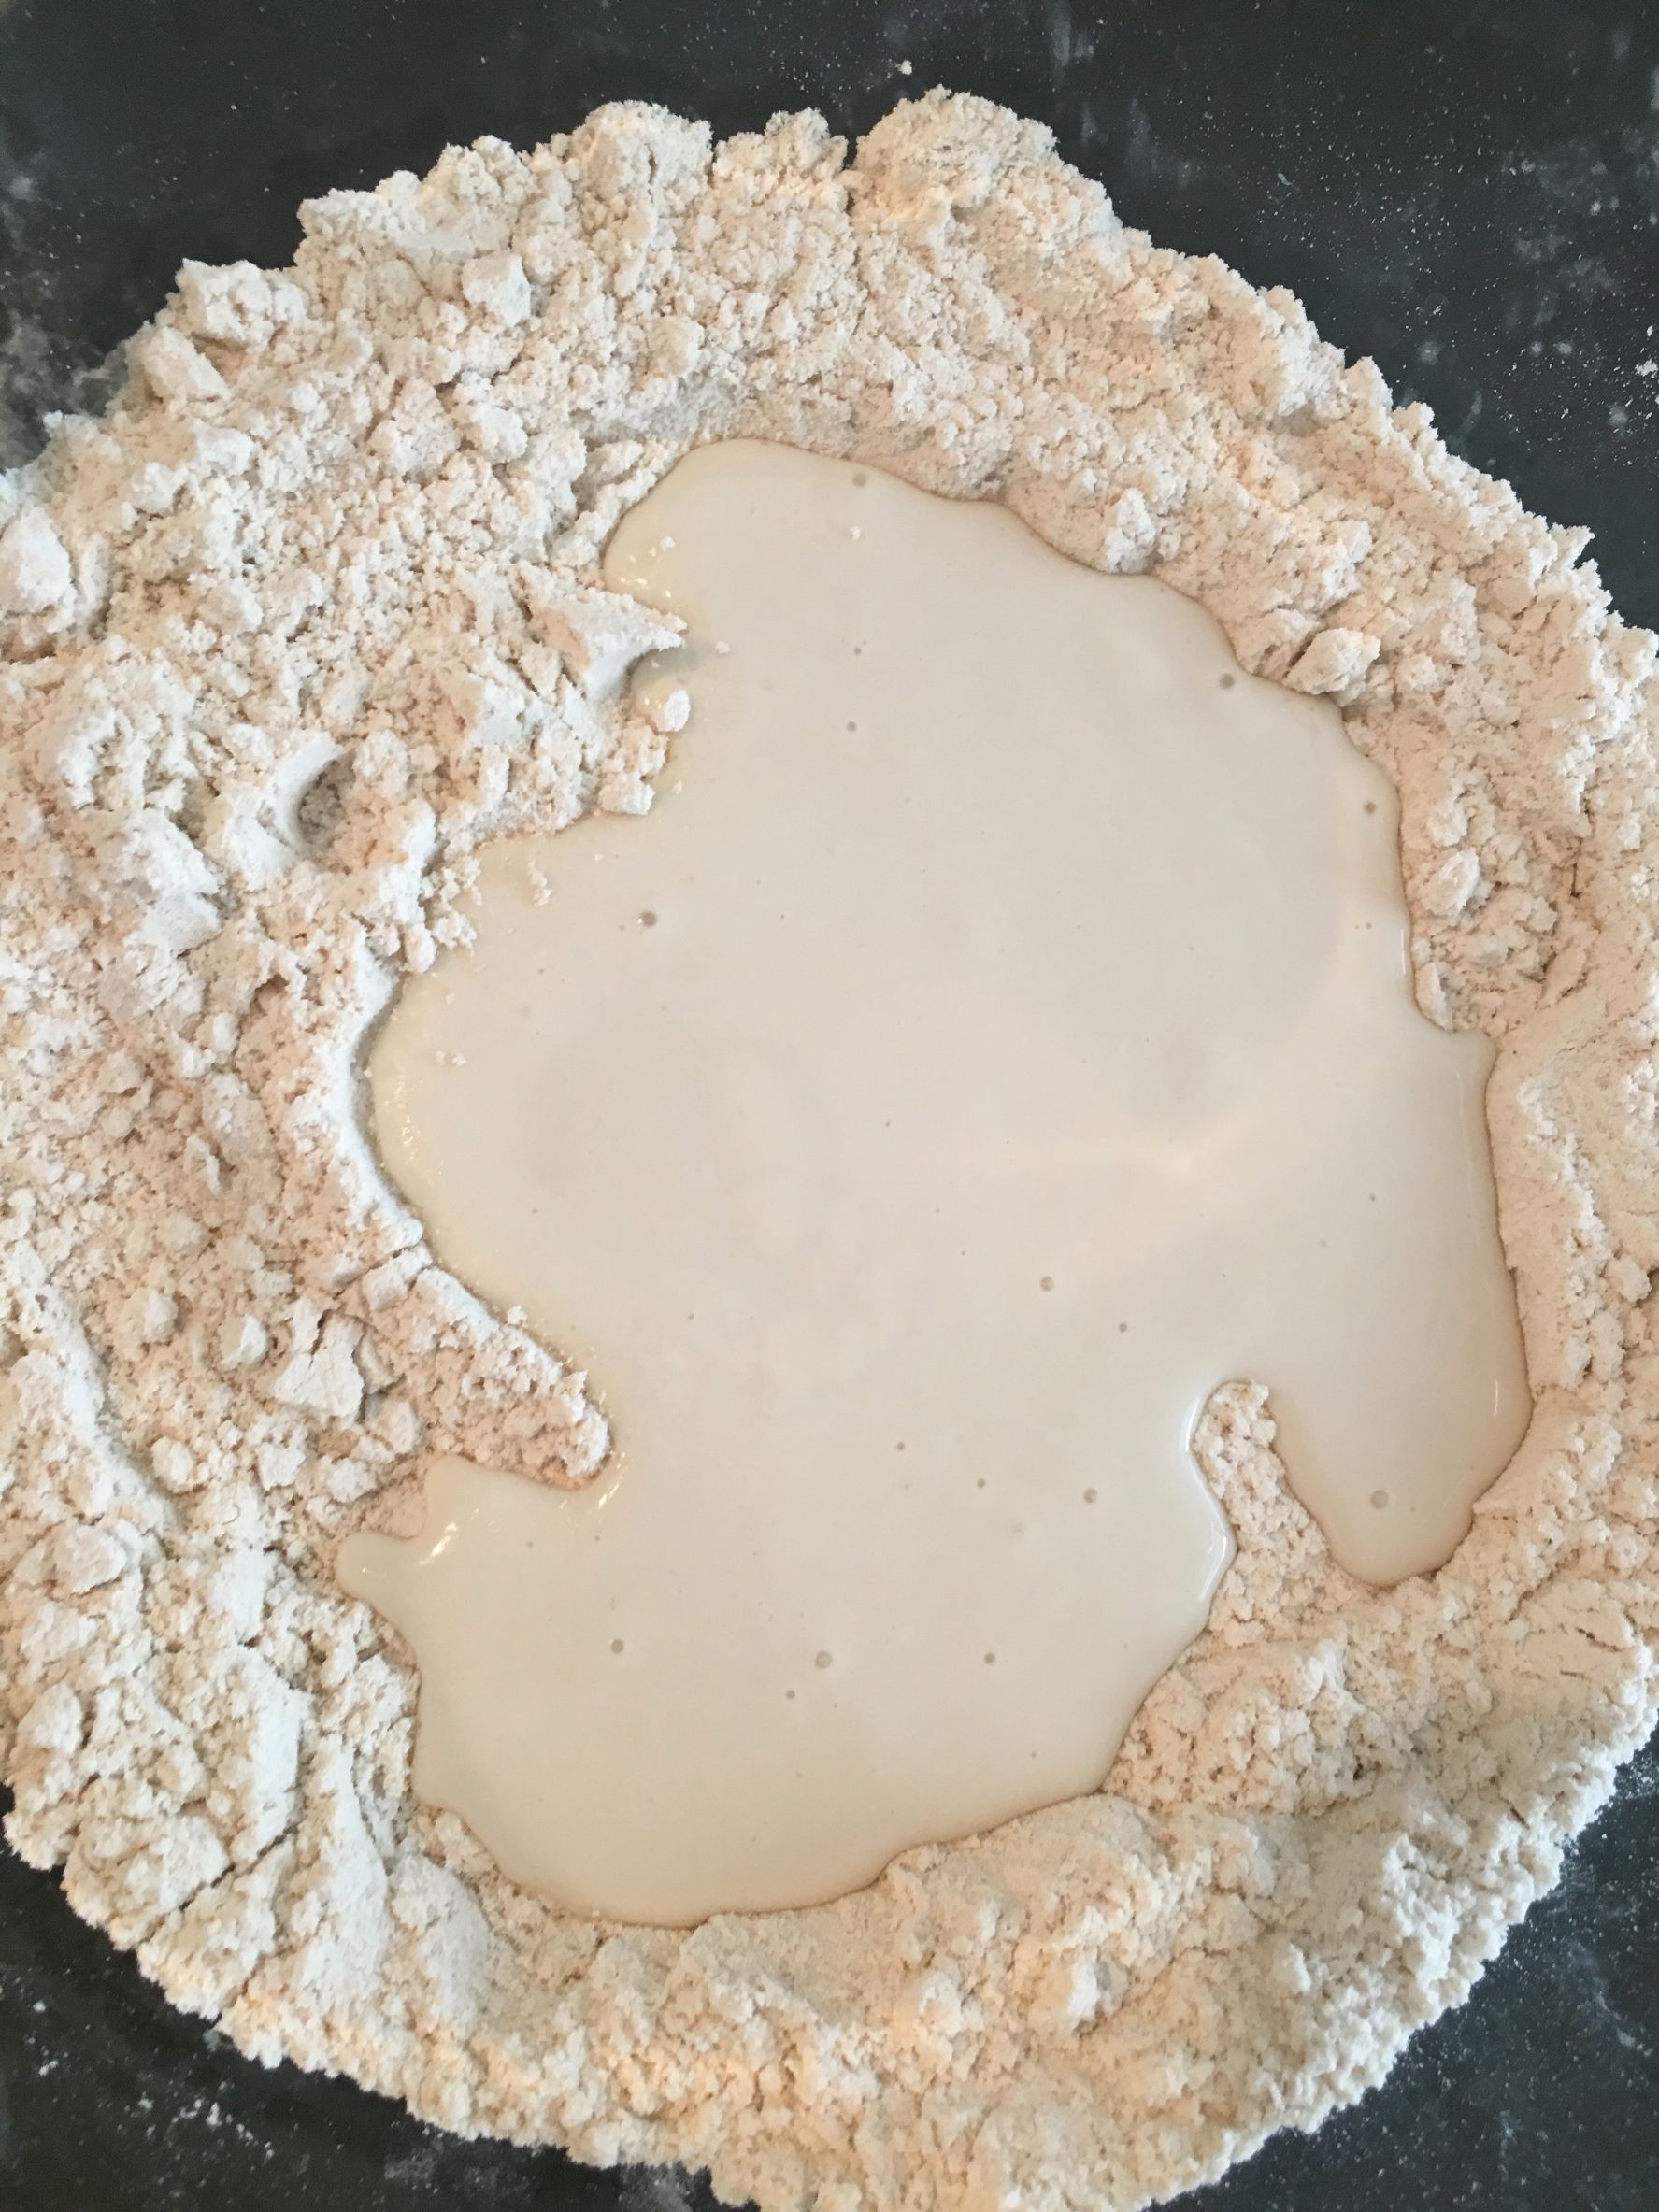
Take another bowl. Put APF, salt and mix them properly. Make a well in the middle and pour the frothy mixture into the well. Mix all well and transfer the dough onto the kitchen counter. Knead well till it becomes a smooth ball. You can sprinkle 2-3 tsp of flour if the dough seems very sticky. It takes hardly 2-3 minutes.
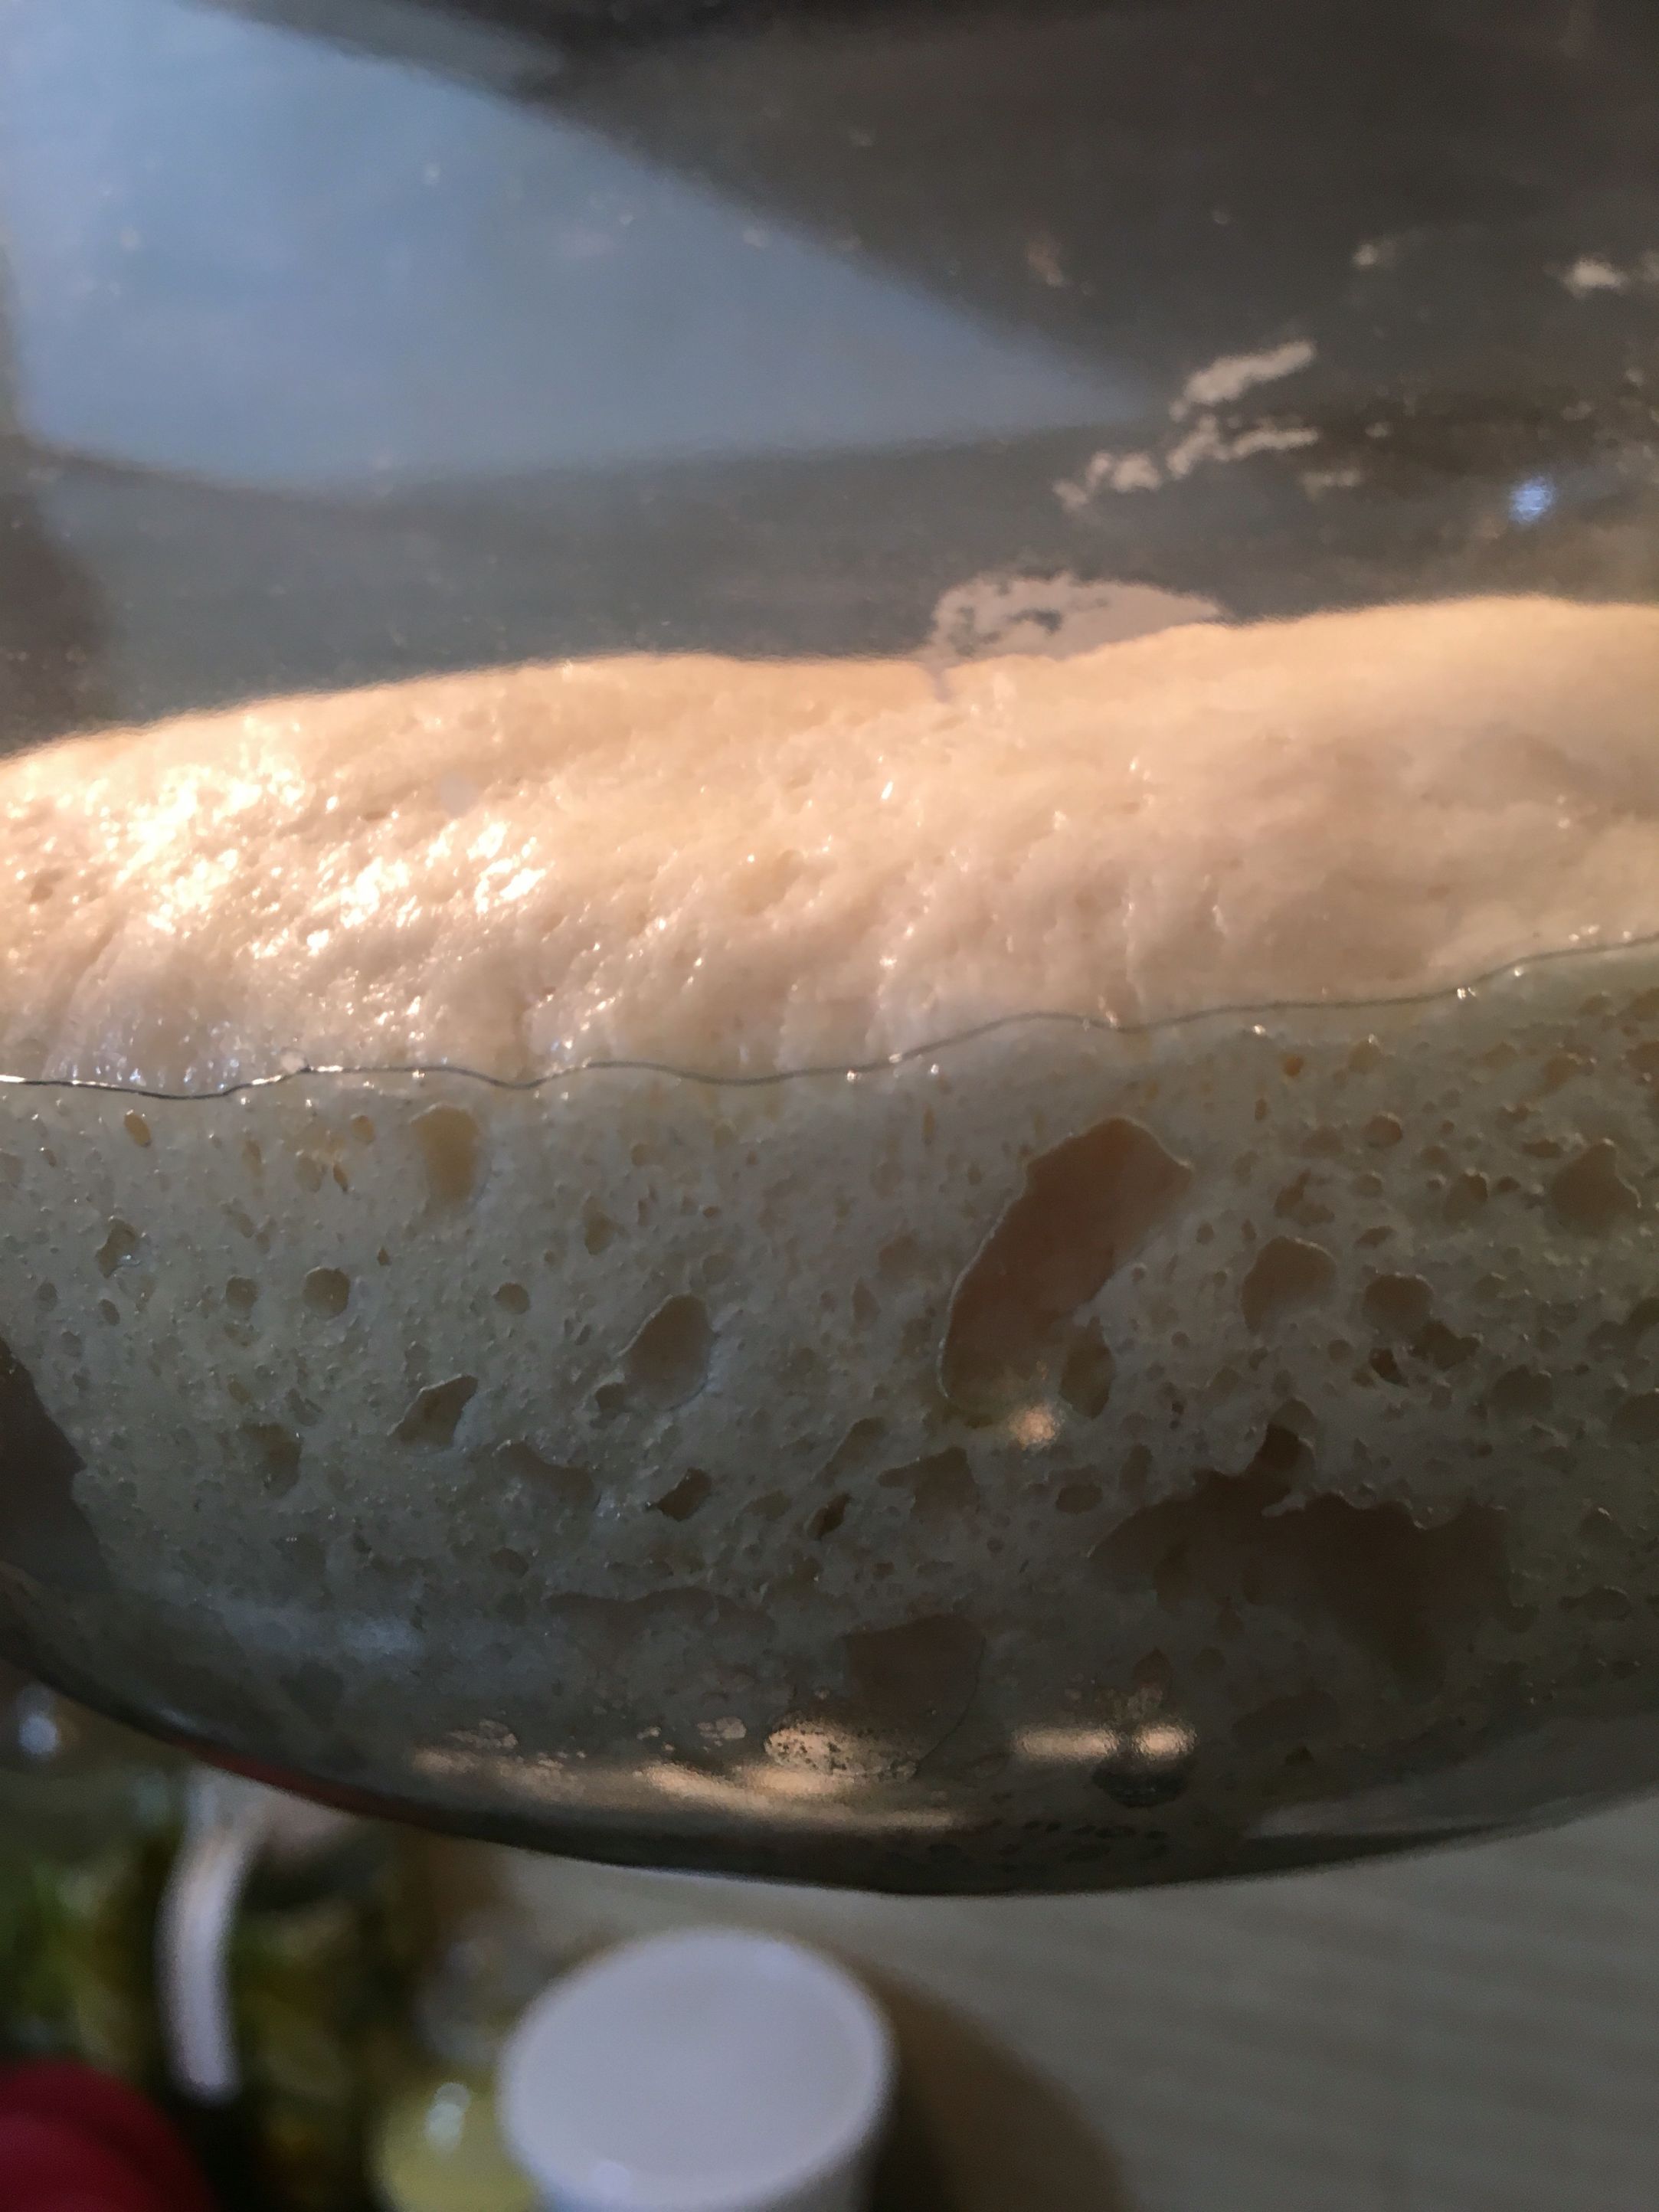
Now take a deep bowl and grease it with oil. Put the dough into it and roll the dough so that it gets greased from all sides. Now cover the bowl with cling film and place it on the warmer corner of your kitchen for an hour.
Now take 2 parchment paper. On one parchment paper place the butter. It should not be at room temperature neither frozen. It should be soft as you can roll pastry roller on it or dab it with same. Now place the another parchment paper on it. Dab it with roller pin till gets the measurement of 8″×5″. With the help of knife or scraper cut the uneven sides and keep on adding to the top of butter brick. Place it in freezer for 20 minutes until harder.
After an hour, take out the doubled dough from the refrigerator. Sprinkle some flour on kitchen counter and roll the dough in rectangular till it gets the measurement of 16″×10″. Take out the frozen butter and just pull apart the butter paper. Place the butter on 1/3 rd of rolled dough and fold it like business letter.
Now sprinkle some flour on both sides of the dough and roll it till it measures 15″×10″. Fold it again like business letter (1st fold). Wrap the dough in cling film. Refrigerate for 1 hour.
After 1 hour take the dough out and again sprinkle flour on both sides of it. Roll it to 15″×10″ (2nd fold). Refrigerate for 1 hr. Repeat for more 2 times at an interval of an hour. In all, there should be 4 folds. This foldings gives the buttery flakes and if in between rolling the dough, you fell butter sticking onto the roller pin, just stop there and place the dough in refrigerator for 20-25 minutes. After the last fold, place it in refrigerator for 12-14 hours. I left for overnight.
Now take the flour folder out from the refrigerator and roll again for 15″*10″.
Take a cookie cutter and cut the roundels.

With a bottle cap cut smaller roundels in the middle. Place them on the baking tray and leave it covered with cling film for an hour. It will double in size.
When you are about to bake in the next 10 minutes, just preheat oven at 180°c for 10 minutes.
Place the tray on the middle rack of your OTG and bake for 15-20 minutes.
Unlike croissants there’s no need of brushing the top with milk or egg because we are going to glaze it after cooling.
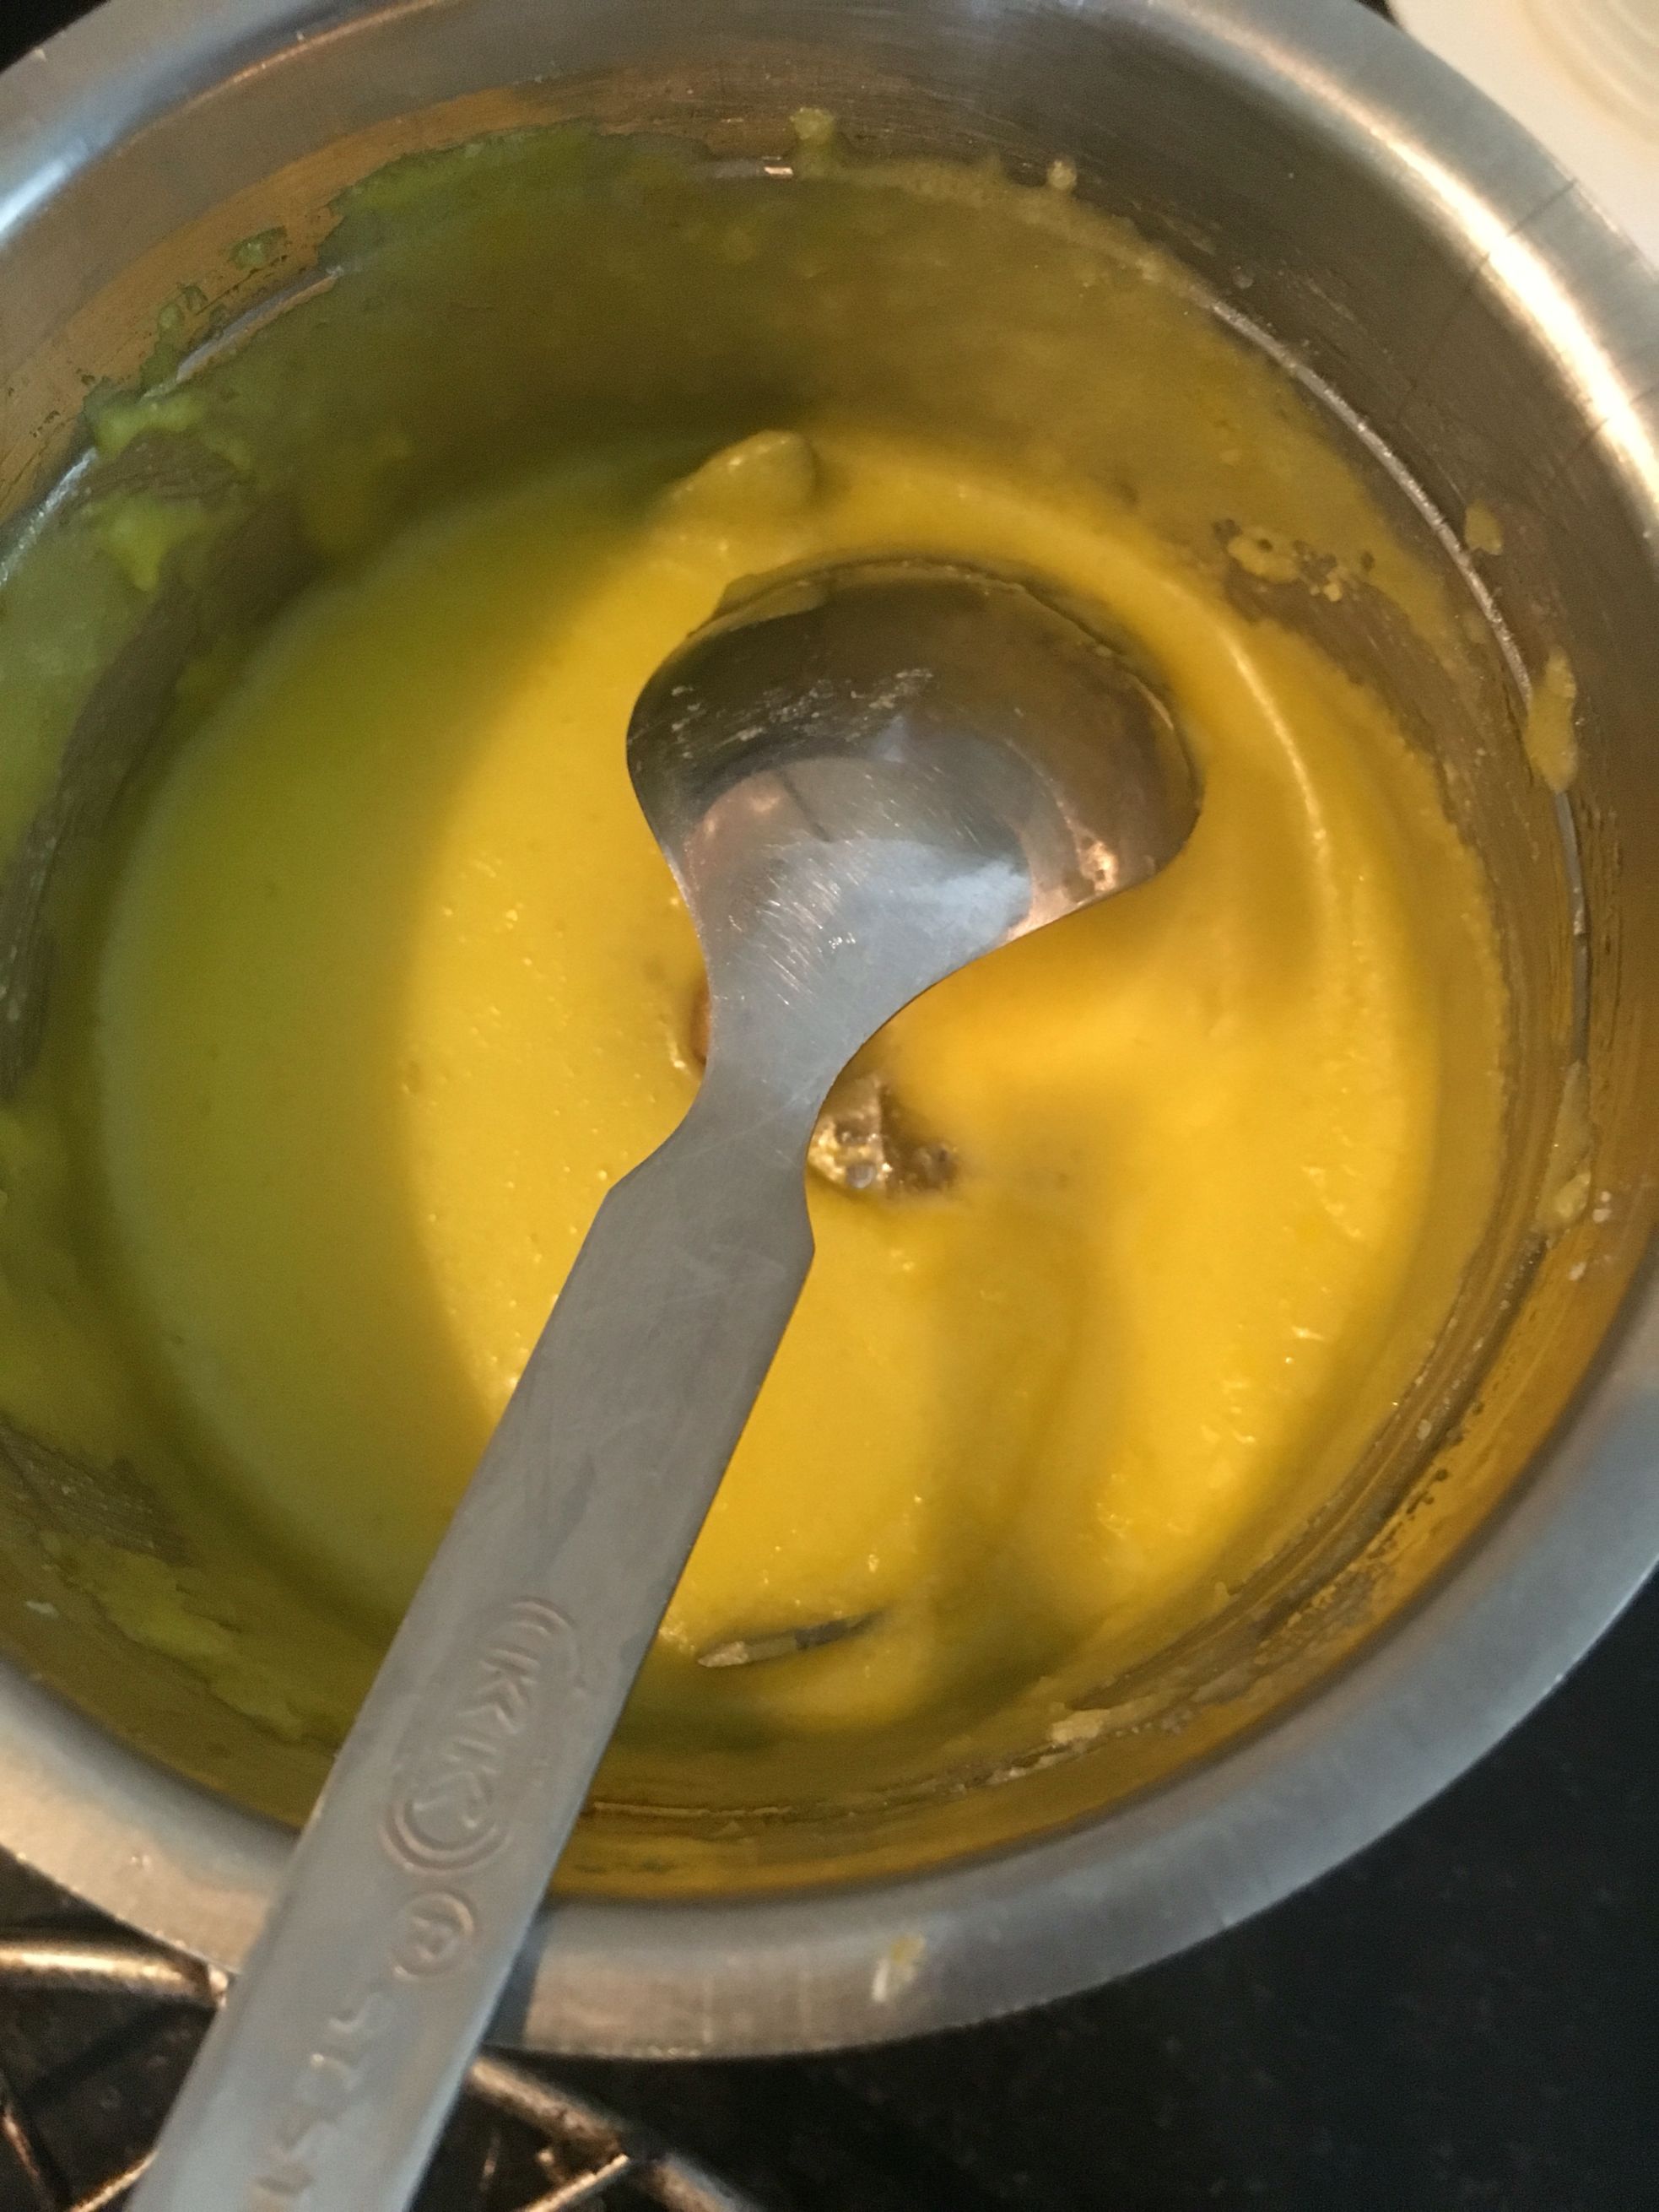
By the time they are getting baked. Prepare your glaze. Mix all the ingredients of the glaze mentioned above. Can add 3-4 drops of normal water if the glaze is not appropriate as per its consistency. Do remember to cover it and keep it aside.
Now as your cronuts are baked, take them out of the oven and let them cool on wire rack.
Time to garnish them. Just dip the upper crust of cronuts onto glaze and sprinkle the sprinklers on top. Here you can decorate as per your choice.
Finally time to eat cronuts and munch those munchkins.. Enjoy😄
KEEP COOKING👍🏻👍🏻
Mouthwatering
Tq u so much dear😍😍
Mouthwatering
Tq u so much dear😍😍